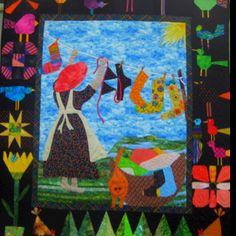
Memory Quilt
For this project, we will be tapping into our ancestry and family history. You will be asked to interview a family member in order to learn more about them and their story. From this interview, you will write their story and create a visual representation - a memory square - that you can then present to them.
Materials
|

|
Process - Day 1-3
- Interview a family member. Questions provided.
- From the interview, pick out details, or the most interesting story that they shared and write the story (min. one paragraph). This story will ultimately be your artist statement that goes with the quilt you create.
- From the story and in your sketchbook, create a storyboard with at least three images. These will need to be full detail and full colour.
- Choose one image from your storyboard that you would like to enlarge and eventually turn into the quilt piece. Re-create this image to scale (one full sized page in your sketchbook.
*The difference now, is that you will be simplifying the image to use bigger, more manageable shapes. Remember, eventually, you will be working with felt.
Process - Day 4
- Once you have your to scale drawing - the rough draft of your memory quilt. It's time to learn some stitches.
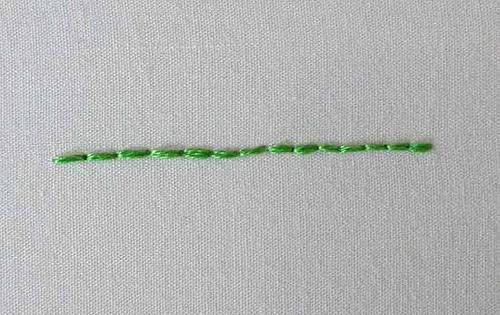
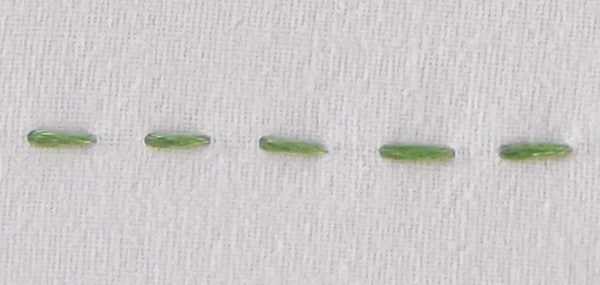
- For this project, you will learn how to use three basic stitches: running, back, and blanket. You will need to demonstrate all three stitches in order to get full marks.
*There are Video Tutorials at the bottom of this page and all over YouTube. Learn something*
Running Stitch |
Blanket Stitch |
Back Stitch |
|

|

|

|
|

Process - Day 5-6
- Now that you feel good about the three stitches, take a moment and look at your to-scale drawing. Indicate where you will use each stitch with a fine liner or pen.
- Create a folder from newsprint paper: fold it in a half, fold the edges in about an inch and staple/tape the sides down.
- WRITE YOUR NAME ON THE FOLDER - This folder will be where you keep all the materials you are working with.
- Once you're ready, show your teacher the to-scale drawing in order to receive your background.
- Using the scrap bin as best you can, start cutting and piecing together your memory quilt.
- You won't start gluing or stitching until you've cut all the pieces you need.
Process - Day 7-10
Once you're done, hand in both the quilt and the story that goes with it. |
|
Video Tutorials
Flat Knot |
Running Stitch |
Blanket Stitch |
Back Stitch |